

A Hollow Coronation Step 1
Destiny two Ager'south Scepter Exotic Quest Guide - Where To Detect All Atlas Skews For Tracing The Stars
Along with a new story and new seasonal activities to explore, Destiny 2's Season of the Lost also includes a new Exotic mission that has you chasing a trace rifle called Ager's Scepter. The path starts with the Tracing the Stars quest, given by the Awoken queen, Mara Sov. After telling a story of a mythical family of kestrels and the powerful artifacts they created, Mara sends you out to endeavour to remember those artifacts, but this quest spans a few weeks of searching earlier it unlocks a quest called A Hollow Coronation, which will end with you challenge Ager's Scepter for yourself.
Each week, nosotros've seen Mara Sov send you out to the Dreaming City in the Tracing the Stars quest, to observe v "Atlas Skews," or special artifacts. Beneath, you'll detect a complete list of all the Atlas Skews yous can notice correct at present and their locations, as well as everything yous demand to know about how to complete A Hollow Coronation and merits the new Exotic.
Table of Contents [hibernate]
- Tracing The Stars I
- Divalian-Rheasilvia Path, Lower Cliffside
- Divalian-Cimmerian Path, Central Cave
- Drowned Bay Alcove
- Spine Oracle Orrery
- Afar Spine Island Tree
- Render To The HELM
- Tracing The Stars II
- Strand Towering Statue
- Strand Gazebo Statue
- Garden Waterfall
- Garden Bridge Tree
- Aphelion Brazier
- Return to the HELM
- Tracing The Stars Three
- Rheasilvia Secluded Statue
- Rheasiliva Lower Level
- Rheasilvia Temple Overlook
- Straw Sidehall Statue
- Harbinger Ahamkara Skulls
- Return to the Helm
- A Hollow Coronation (Ager's Scepter Quest)
- Harbinger Cathedral
- Confluence Tree Triad
- Confluence Throne Portal
- Confluence Giant Crystal
- Garden Entry Statue
- Return to the Captain
- Non So Fast--Time To Play Astral Alignment
- Supers And Champions
- Complete 3 Specific Strikes
- Complete A Hollow Coronation
Tracing The Stars I
The showtime batch isn't as well tough to find if you lot know the lay of the land, merely the skews are frequently in out-of-the-fashion places that are easy to miss. Here's where to find each of the Atlas Skews for Tracing the Stars I to accelerate the mission in its start week.
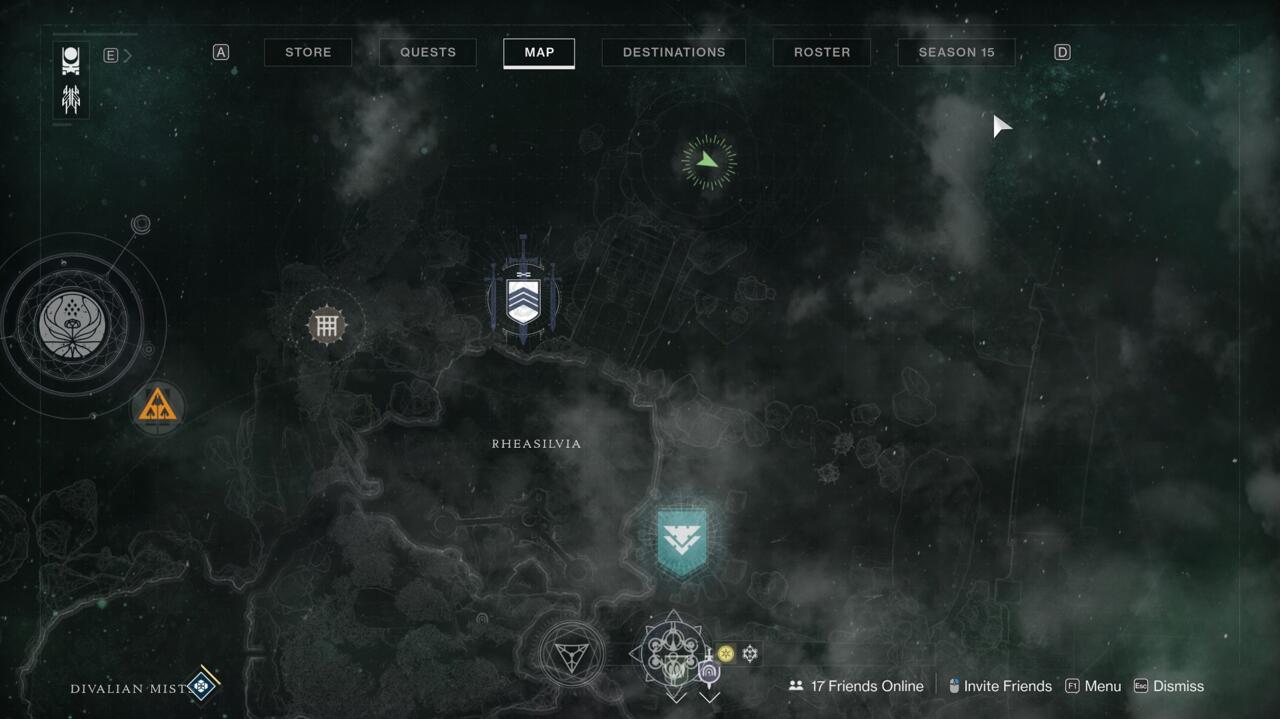
Divalian-Rheasilvia Path, Lower Cliffside

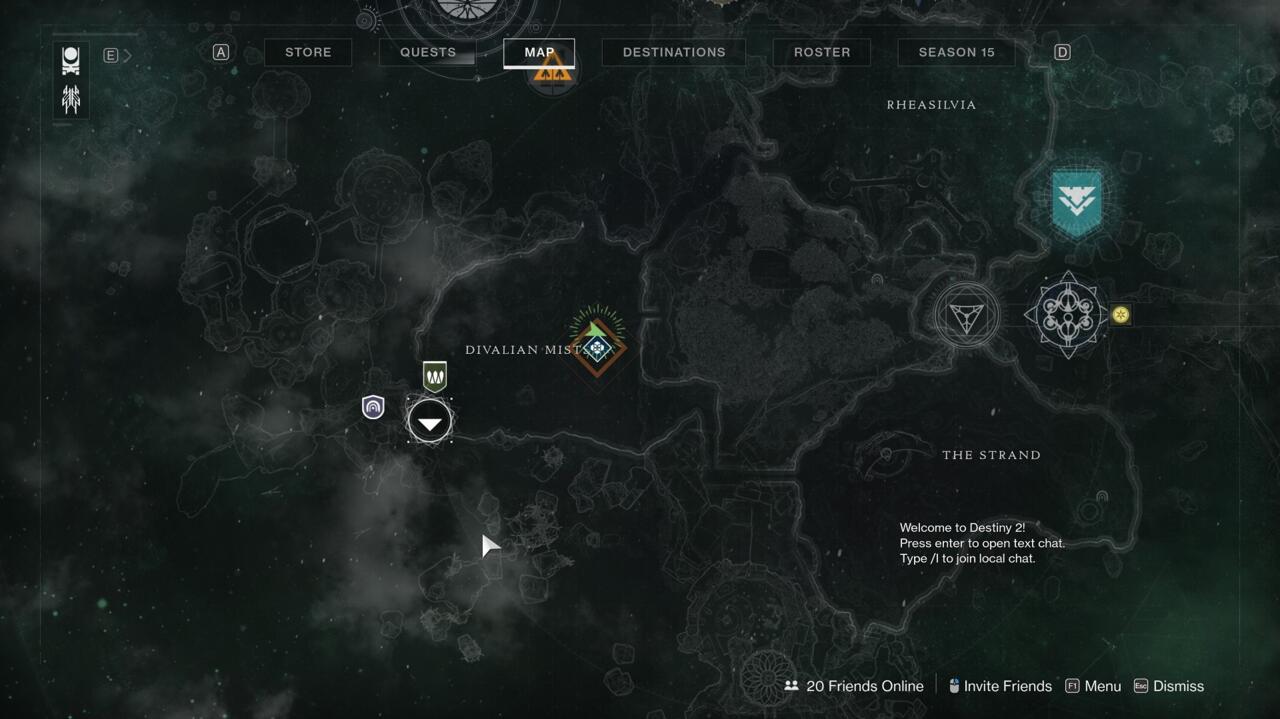
Find your kickoff Astral Skew on the west side of Divalian Mists, where you first spawn into the Dreaming Metropolis. Caput toward the mountain pathway that leads to Rheasilvia, but don't go into the tunnel to pass through. Instead, look off the cliff to the left for a spot where you lot can drop down far below. Follow the cliffs to the southward to notice the Atlas Skew on one of the jagged rock platforms.

Divalian-Cimmerian Path, Key Cavern
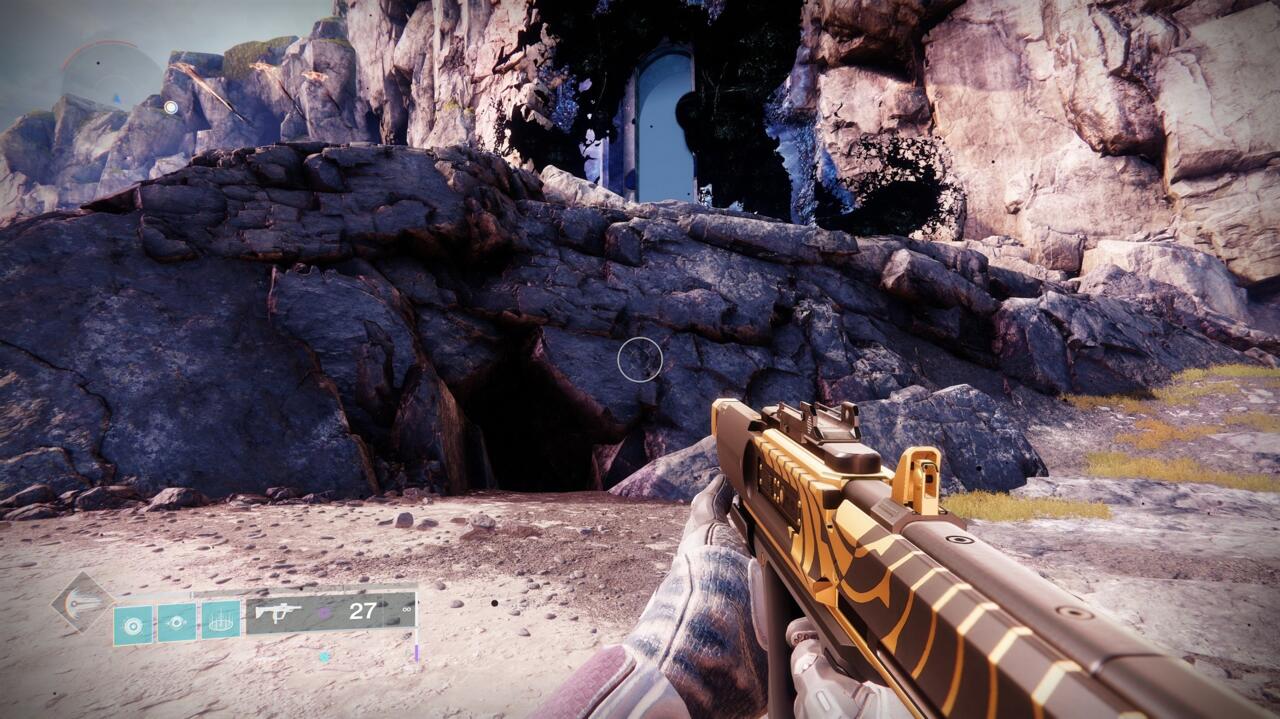
This one's a bit more than confusing because the Cimmerian Garrison is non a location marked on your map. The cave it's referring to is easy to find, though. From the Divalian transmat zone, head forward toward the large doorway that leads to the Bullheaded Well. Stay on the due east side, about the water stretching out into the mists, and cease at the base of operations of the stairs before climbing into the raised heart area. Look for a cavern hither--Hive enemies commonly spawn from it. Your Atlas Skew is inside.

Drowned Bay Apse
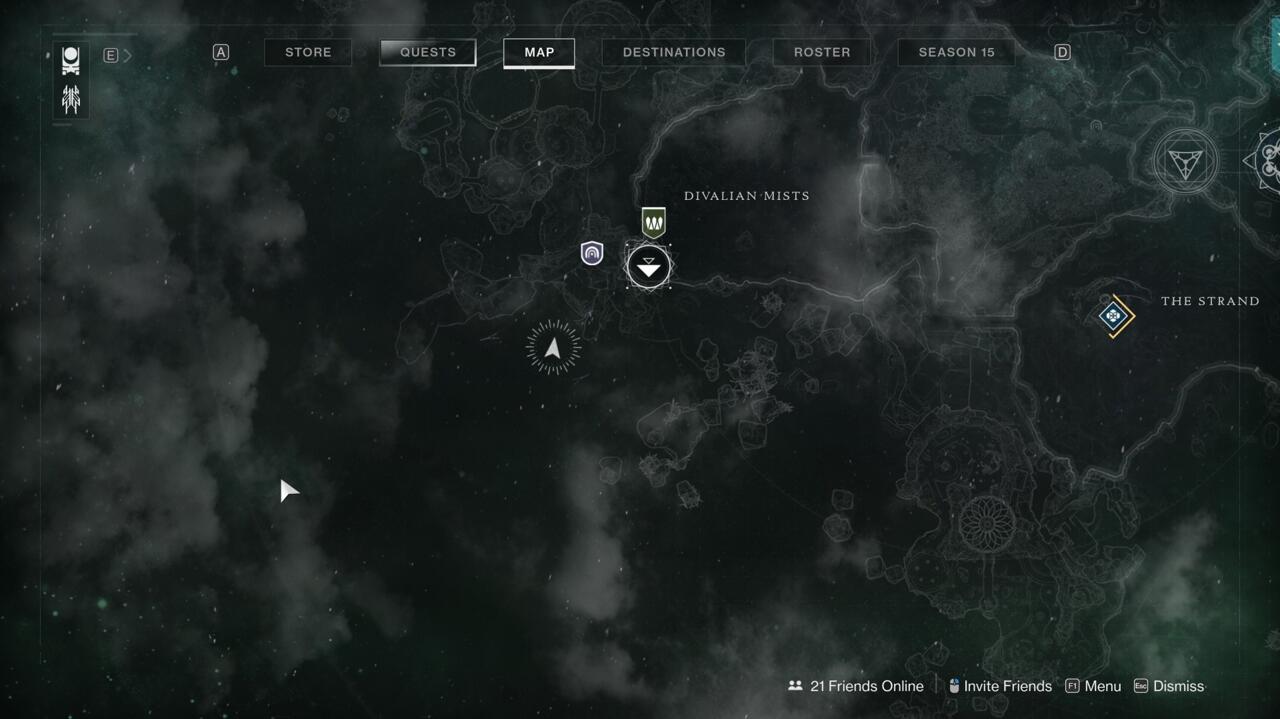
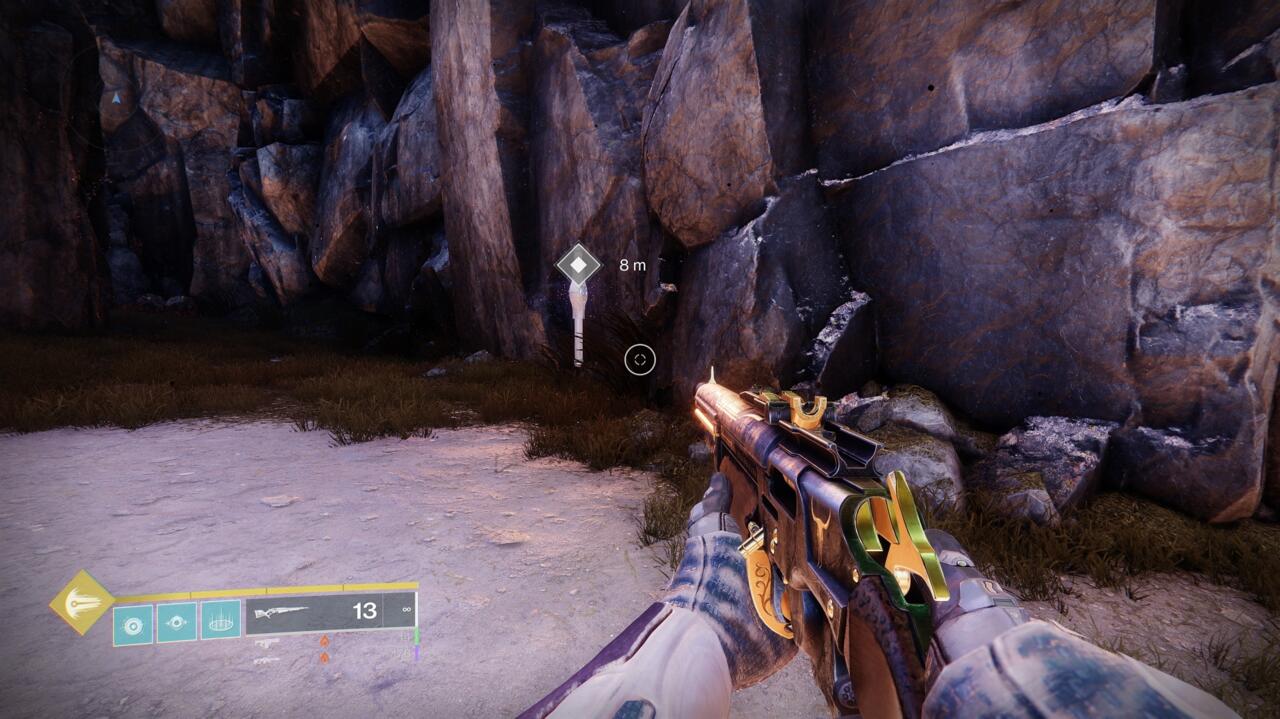
The 3rd Atlas Skew is in the Bay of Drowned Wishes Lost Sector, located right backside the transmat bespeak yous beginning at when you enter the Divalian Mists. Head into the cavern at that place and you'll find yourself on a dried-out seashore populated by Scorn enemies. Clean them out and hug the wall to your right; the Atlas Skew is just around the corner from the entrance. If you striking the door blocked past the forcefield (and waves of Scorn enemies), you've gone too far.
Spine Oracle Orrery

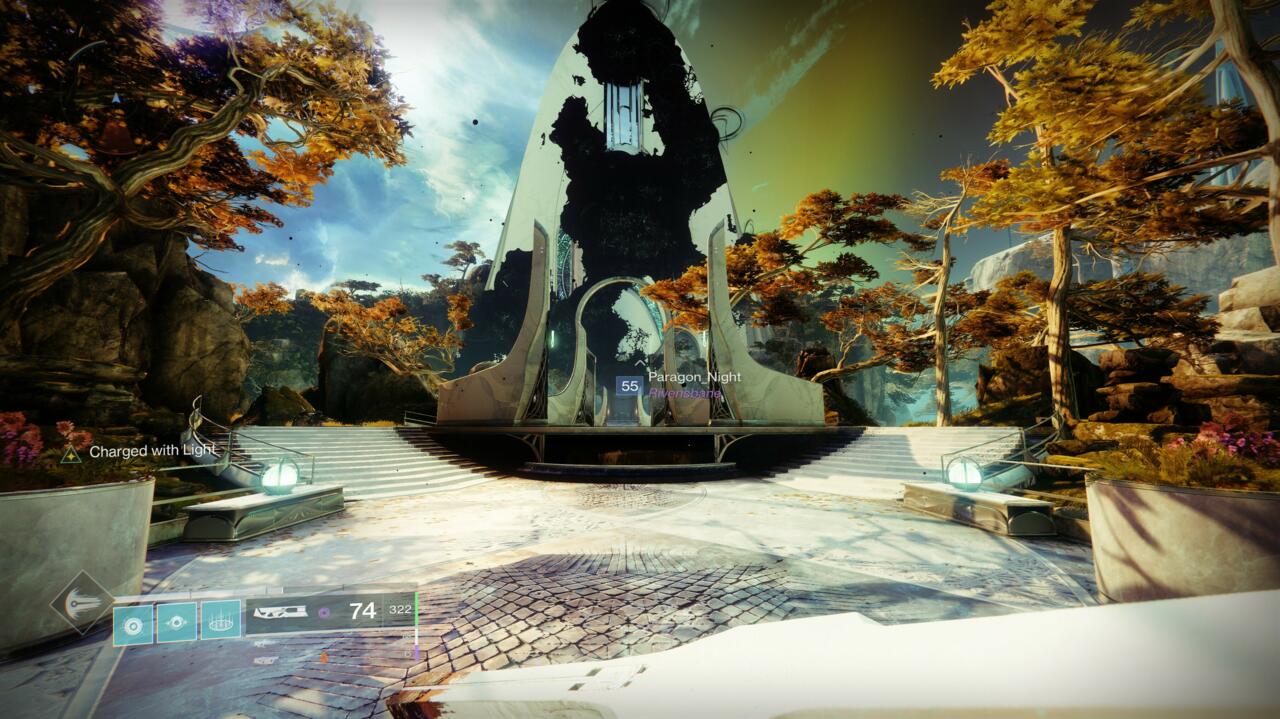
Head to the Spine of Kerres for the next Atlas Skew. Y'all can accomplish information technology past going through the large crystal archway across from the doorway that leads to the Blind Well. Follow the path until you circular a corner and run into the Oracle Orrery ahead of you--information technology's a huge building, and if y'all've played through the Forsaken expansion, you'll call up contacting Mara Sov here. Cross the crystal courtyard outside, where you'll fight through some enemies, and enter the edifice. Take the stairs on your right that loop all the way around the outside of the edifice until y'all striking the top. The Atlas Skew is against the wall when you reach a dead end.

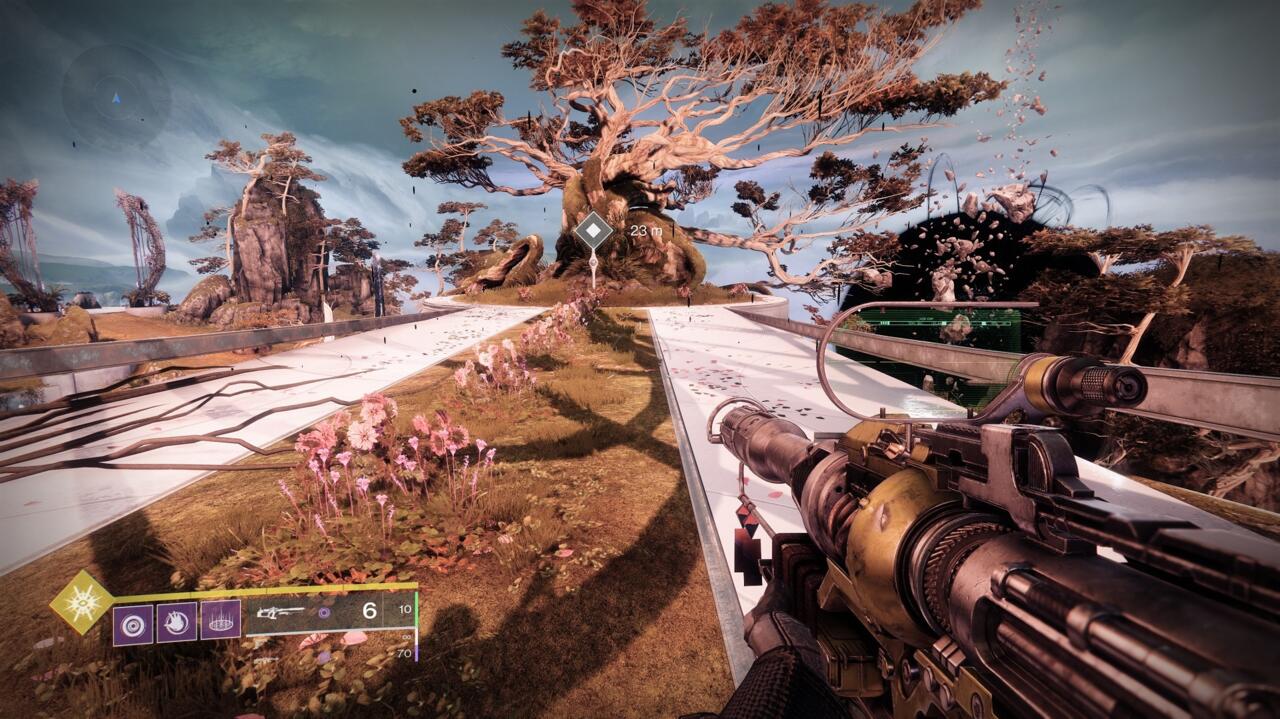
Distant Spine Island Tree

Your last Skew is also in the Spine of Kerres, and from the 4th one, it's easy to get to. Head back into the Orrery and leave by the door to the correct as you lot starting time enter. You lot'll cross a span that leads to some rocky islands reaching up out of the mists. Proceed beyond them, by the sniper that spawns along the fashion, until y'all're nearly at the end. You'll know y'all're running out of path as you start to see islands cropping upward on your right and enemies continuing on the beach nearby. Look for a big, gnarled tree on but nigh the final island on this path, before yous turn to your right to caput toward those enemies. The Atlas Skew is nestled beneath the tree on the isle hither.

Return To The Captain
Once you've got all five Atlas Skews, return to the HELM screen of the Director and expect for a mission node chosen "A Hollow Coronation." Select it and Mara will tell you a little more than virtually the story of the kestrels and your overall mission. Nosotros'll have to look until next week to advance the mission further, however.
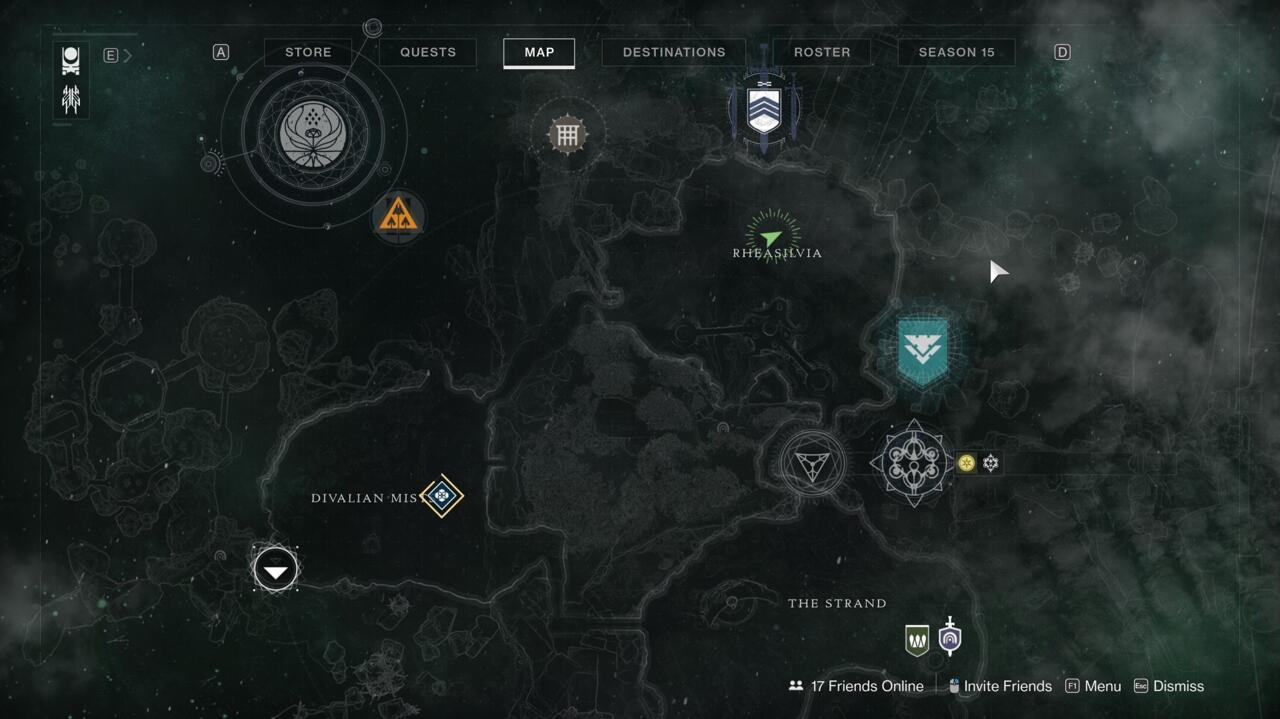
Tracing The Stars II
The 2d pace in the quest sends you to the Strand, one of the 3 areas of the Dreaming City, for a new fix of Skews. These ones are incomparably easier to locate than the showtime week's, as it happens.
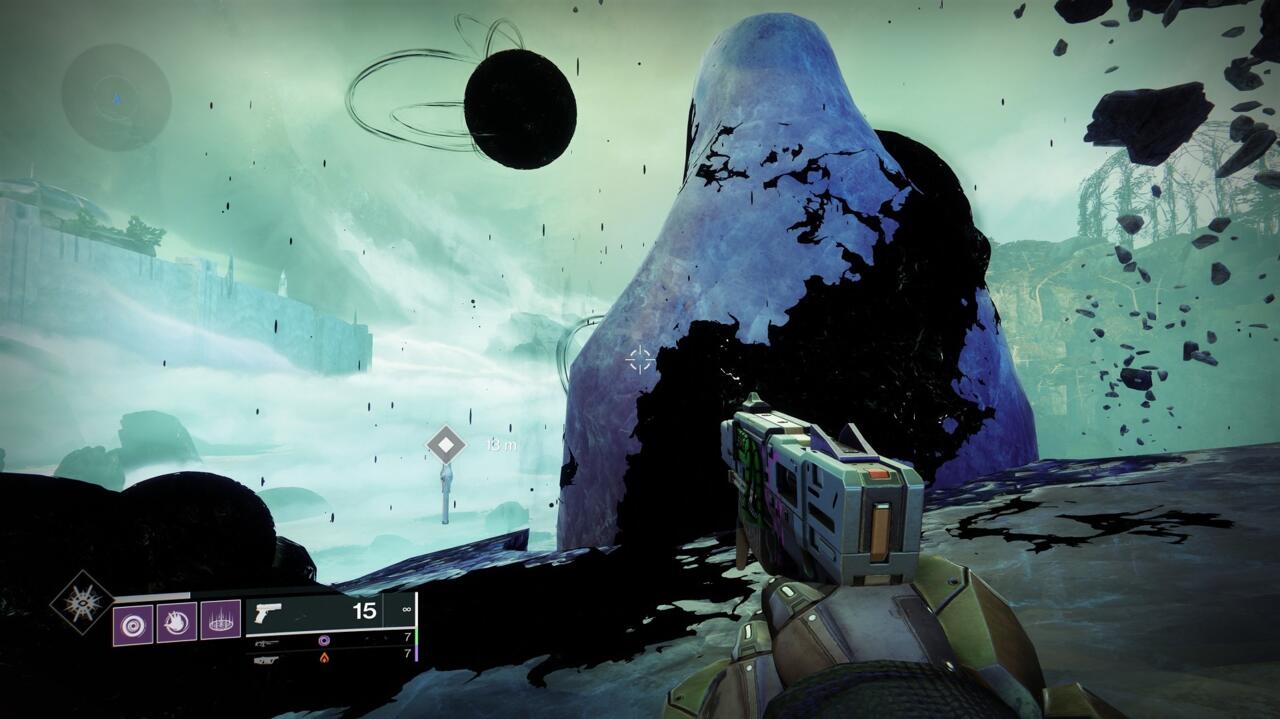
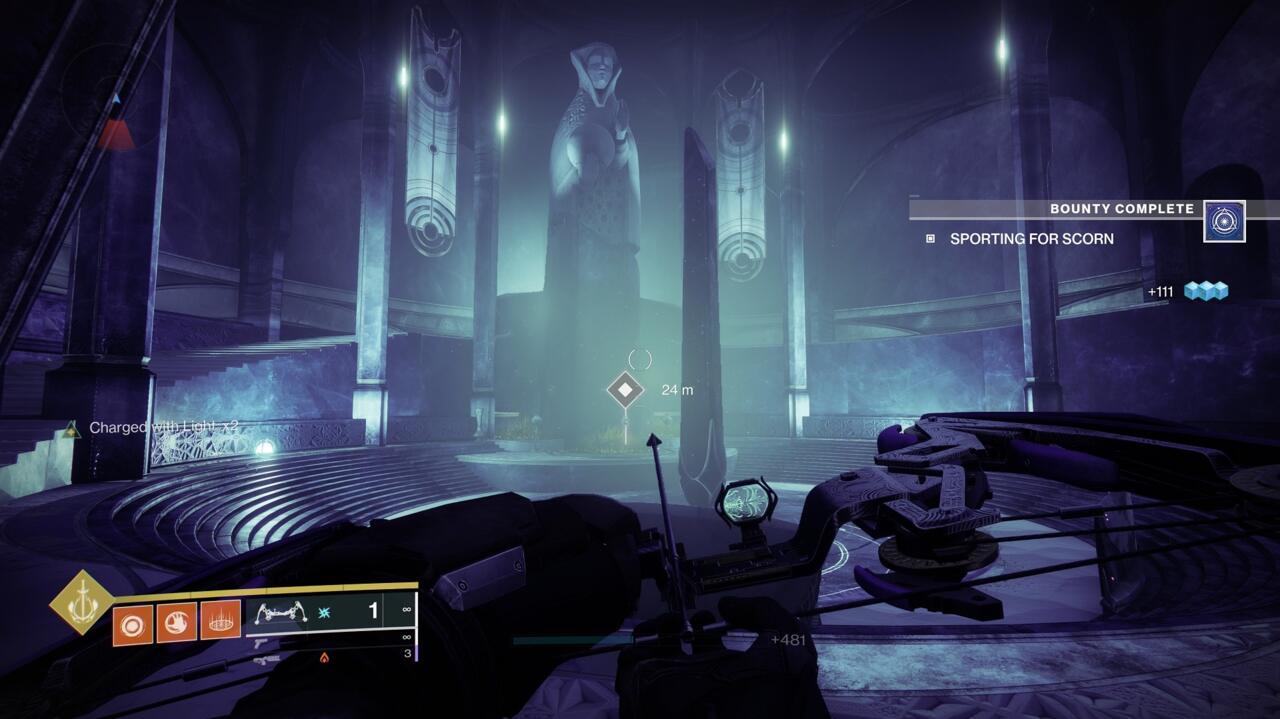
Strand Towering Statue
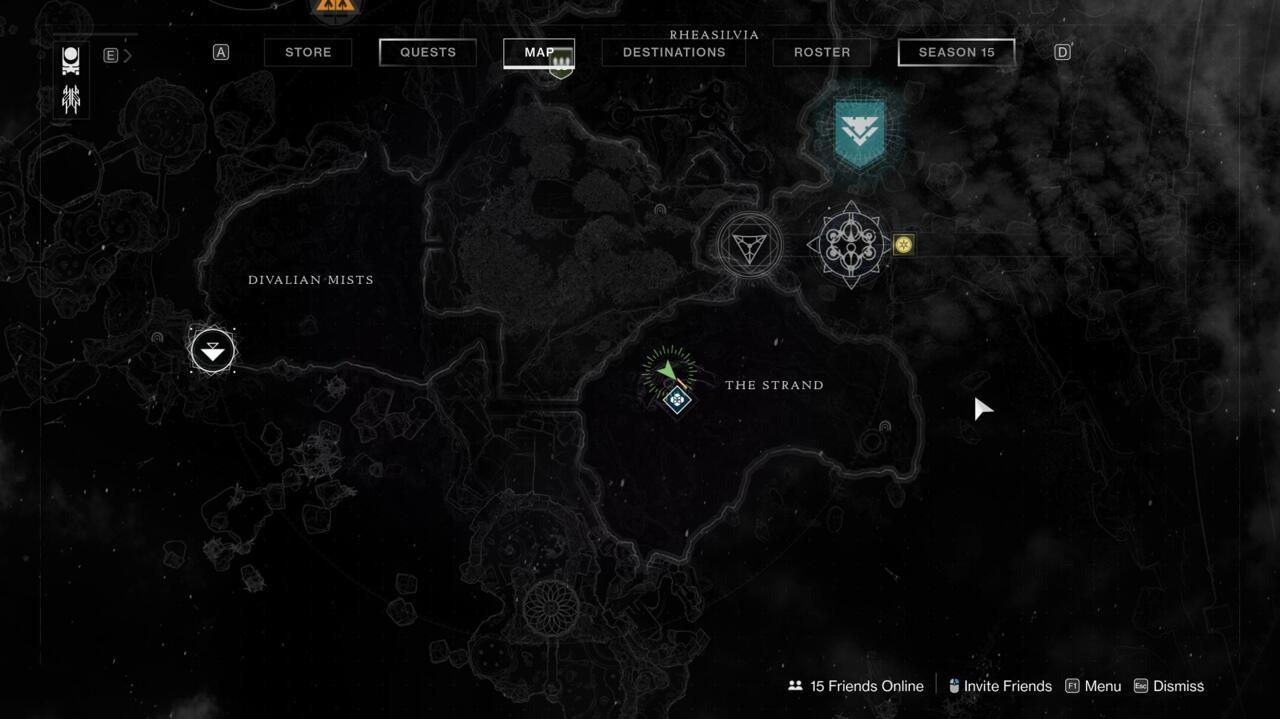
Climb the big statue in the center of the Strand to find this Skew. Information technology's easy to come across, and the statue is impossible to miss.
Strand Gazebo Statue

Head to the southeastern corner of the area to find the 2d Atlas Skew, the clue for which notes a gazebo and a statue. This is another piece of cake ane, although you'll find the statue in the back of the gazebo here, but the Skew is a little further away. Climb out onto the ridge behind the gazebo, where trees are growing, to find the Atlas Skew closer to the surface area's edge.

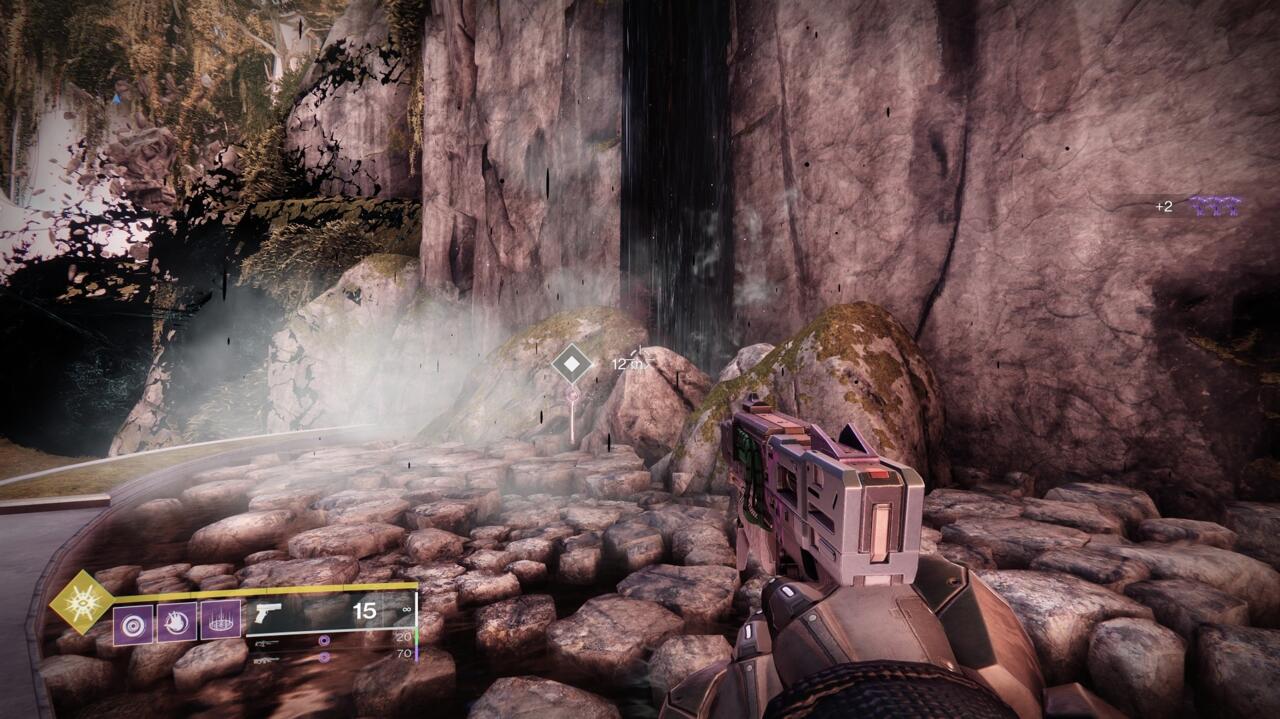
Garden Waterfall
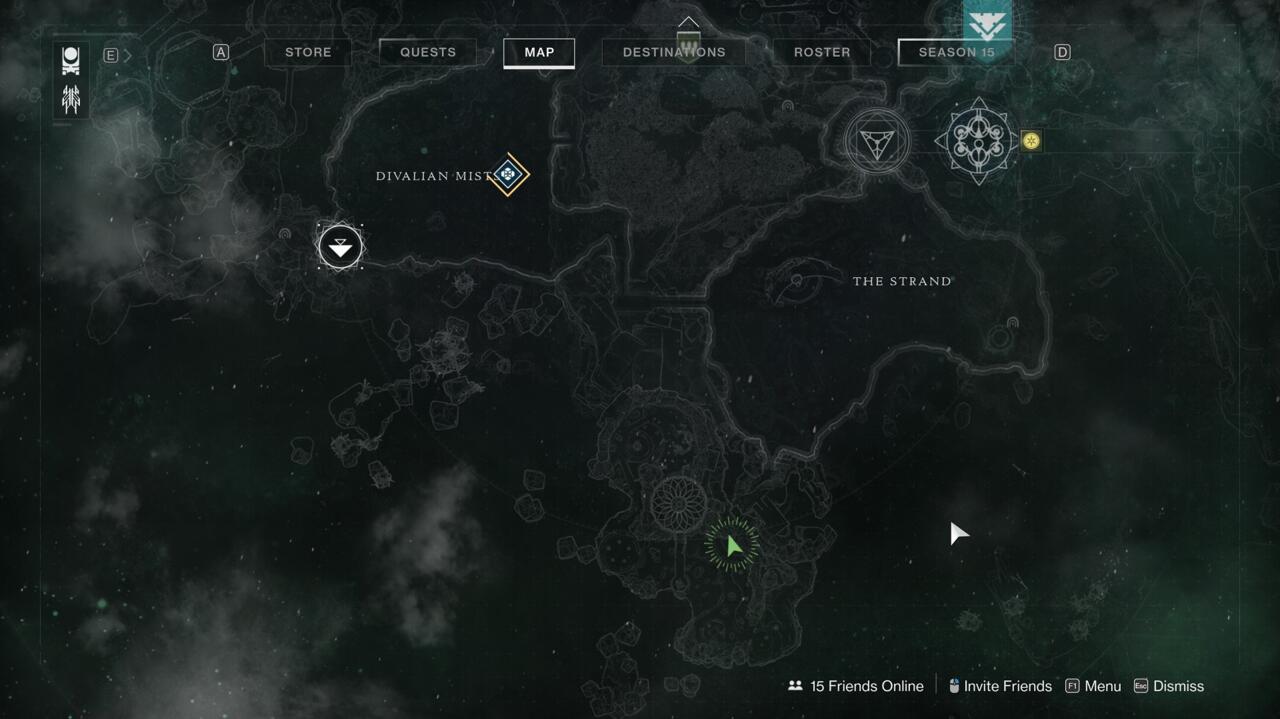
Yous'll need to become to the Garden of Esila for the next two Atlas Skews, and this surface area isn't labeled on your map. Head to the Strand and make for the southernmost tip of the area to observe a doorway and some stairs leading upwards into it. Follow the path to notice a large open up surface area with a bridge and a huge tree in the center (mark that for later). The commencement skew is waiting next to a waterfall on the correct side of the area as you enter it.
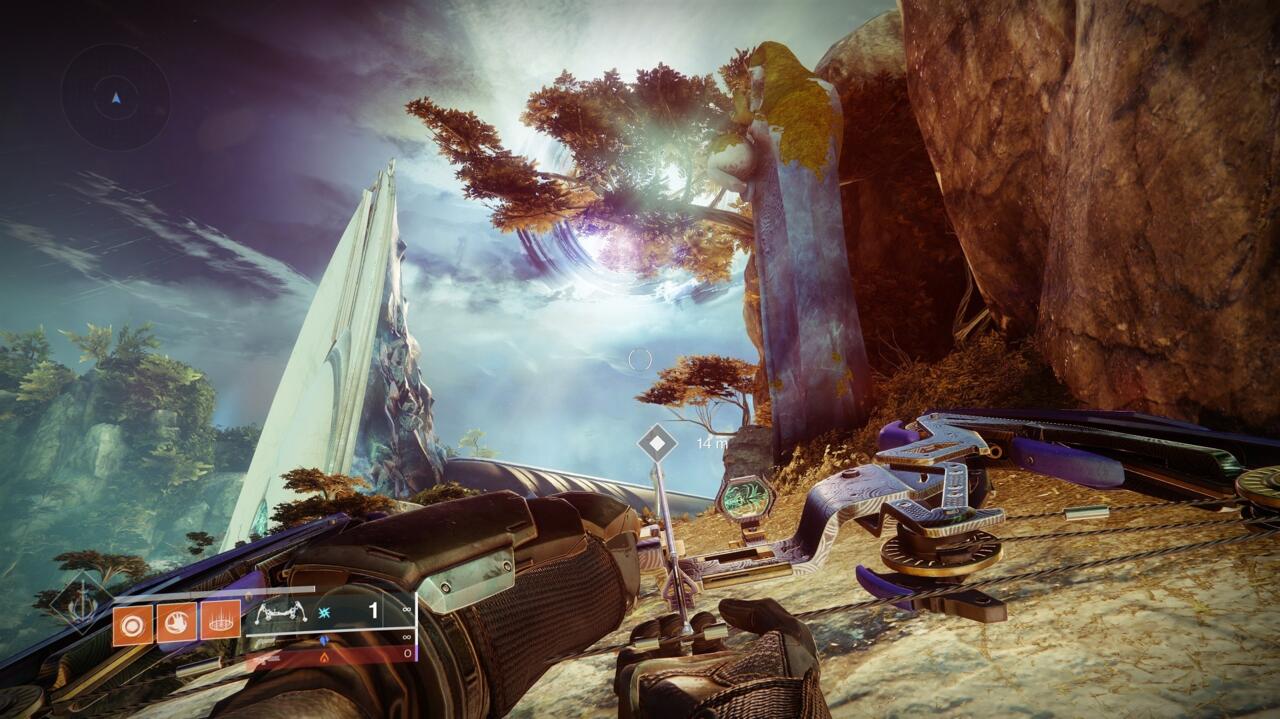
Garden Bridge Tree

If you lot're peculiarly jumpy, you can climb up to the central bridge over the height of Garden of Esila. If not, keep pushing across the open area to the blue platform at the far side, then follow the path correct all the way around. You'll fight through some diverse enemies and find an Ascendant portal at the top of the path. Walk past information technology to find the bridge across. Information technology leads to a big tree with the Atlas Skew waiting in front of it.
Aphelion Brazier

The concluding Atlas Skew is located in the Aphelion'southward Rest Lost Sector. It's easy to find, but you might as well complete the Lost Sector along the way, since the Skew is located at its end. Fight through to where the boss spawns. Behind the Lost Sector's breast is a brazier--a imperial bucket with a tombstone-shaped rock behind it. Right backside that is the Atlas Skew.

Return to the HELM
Equally with the first week, your final step is to hit the Hollowed Coronation node on the Helm screen of the Director. That'll let you venture through the portal to identify more Atlas Skews and listen to Uldren tell more of the story of the kestrels. Y'all'll also hear some of Mara'due south opinions about her brother, and the new course his body has taken, Crow.
Tracing The Stars Iii
For your tertiary batch of Atlas Skews, you lot'll demand to caput to Rheasilvia. This set is a little tougher to lock downwardly, with the Atlas Skews appearing in some obscure locations that aren't too clear from the hints on the quest step.
Rheasilvia Secluded Statue

Every bit information technology turns out, there are several secluded statues in Rheasilvia. Y'all desire the one on the rocky island to the right of the temple entrance that leads you to Harbinger's Seclude.
Rheasiliva Lower Level

Your second Atlas Skew is in the southern department of the area, near the entrance to the Sleeping accommodation of Starlight Lost Sector. Wait for a pathway where y'all can drop down; the Skew is right on the path, and then you won't have to hunt for information technology for long once you lot find your manner to the lower area of these cliffs.

Rheasilvia Temple Overlook
This ane is vague to the point of confusing--much of Rheasilvia could be considered a "temple overlook." The specific spot you desire is rock jutting out beside the path to the temple at the north end of the area, on its left side if yous're facing the temple. It'due south covered in trees, and you can achieve it pretty easily if you jump from the high flat platform at the other end of the area; it's also easy to climb from the ground, and then long equally you take out the Scorn around information technology.

Straw Sidehall Statue

Adjacent, you'll demand to head into the temple and make your way into Harbinger's Seclude. Keep going until you accomplish the huge, well-lit cavern, with a tree standing to the far left and a smaller temple edifice on the right. You'll come across Scorn and Taken fighting here and a behemothic crystal in the eye of the room--this is where you lot started in the mission to defeat the High Celebrant during the Season of the Hunt. Head into the temple on the correct side and go to the statue at the far end to detect the Atlas Skew.
Harbinger Ahamkara Skulls
After getting the Sidehall Atlas Skew, continue through the big door out of the cave room to accomplish another large room, this one with round staircases going down. Jump over the rail to the floor below, and so turn 180 degrees to find another big pigsty y'all can drop down behind you. At the bottom, yous'll enter some other large, cavernous room, this one with two alcoves to your left, each of which housing ane of the Dreaming Urban center'southward Ahamkara skulls. The Atlas Skew is between the two alcoves.

Return to the HELM
It's time to driblet off your Atlas Skews and heed to some story. Hit the "Hollow Coronation" node on the Helm Director screen to turn in your Skews and hear more of the kestrels' story from Uldren. Talk to Mara Sov at the Wayfinder'south Compass when you're washed to get your advantage and clear this week'south step in the quest.
A Hollow Coronation (Ager's Scepter Quest)
If you've been keeping with your Atlas Skews up to now, you should go a new Exotic quest that volition eventually take you to Ager's Scepter, a new Exotic trace rifle. To get information technology, you'll get-go demand to find the last batch of Atlas Skews. For the last batch, yous'll demand to head to the Confluence in the Dreaming City. There are multiple ways to access it, but the easiest for our purposes is through Harbinger'due south Seclude in Rheasilvia.
Harbinger Cathedral
Make your mode to the big temple in Rheasilvia and button all the way to the end. Last week, y'all dropped down in through the large pigsty to reach the room with the Ahamkara skulls to observe an Atlas Skew, and that's where you lot're headed now. When you get to that room, turn effectually and face the big open gap at the dorsum. Head toward information technology and then look for a cave tunnel to the right that leads to an Dominant portal.

That'll take y'all to the Confluence, and the first Atlas Skew will be waiting exterior the portal'due south exit.
Confluence Tree Triad

Push frontwards further into the Confluence and you'll come up into a big circular room with three doors leading out from it. Each of these has an Atlas Skew. Your first one is in the room with the tree.
Confluence Throne Portal

Next, have the door that leads toward a big portal that'due south covered in vines and tree branches. This is the old portal to the Shattered Throne dungeon, and while it'due south not in employ anymore, you lot'll find the Atlas Skew here.
Confluence Behemothic Crystal

The concluding door leads to a room with a big crystal and the last Atlas Skew in this department.
Garden Entry Statue

Finally, head dorsum to the room with the tree. Go past information technology to notice an exit on the far side. Follow the hallways to the cease, where you'll find another Dominant Portal. Beside the statue on one wall is the terminal Atlas Skew.
Render to the Captain
Equally usual, yous'll now bounce back to the Captain using the "A Hollow Coronation" node. That'll accept you to the Gatehouse, where yous can identify your last skews, heed to some other recorded monologue from Uldren, and enter the portal to reach Ager'southward Scepter.
Non And then Fast--Fourth dimension To Play Astral Alignment
Return to Mara and she'll tell you that she needs a little fourth dimension to unlock Ager's Scepter for you lot. In the meantime, head to the Astral Alignment activity in the Dreaming City and brand sure you're packing a rifle of some kind (anything with the discussion "rifle" in the name will exercise; bows, mitt cannons, sidearms, swords, machine guns, and rocket launchers don't count, but annihilation else is off-white game).
You'll demand to rack up rifle kills in Astral Alignment, and earn Parallax Trajectory from anywhere, in order to advance this step. It seems like the burglarize kill requirement volition likely have 2-iii Astral Alignment runs, depending on how many kills you manage to nab in each.
Supers And Champions
One time you've got your Parallax Trajectory and rifle kills, you'll move on to a new requirement. Yous're still playing Astral Alignment, just this time, your goal is to rack up 20 kills with your Super and to kill xviii Champions in the action.
The Super kills shouldn't be tough--option a roaming Super with a long duration and use it to clean upward lots of small enemies in one get. The Champion requirement is a little more strenuous, but not much. Each phase of Astral Alignment includes multiple Champions, and you don't have to go the concluding blow on any of them, simply merely contribute to killing them along with your fireteam. So merely keep an eye out for Champions every bit yous go through Astral Alignment, pay attention to where they spawn, and be sure to accept at least a couple of shots at each one. Once again, information technology merely took usa 2 or three runs of the activity to consummate this step.
Complete Three Specific Strikes
You'll now need to collect items called Strands of Dignity for Mara Sov. These are in the clutches of three Strike bosses scattered around the solar system. That means you'll need to finish the three Strikes to move on. The good news is, yous can enter these Strikes from the Director, rather than from the Strike playlist node--which means they'll be pretty low-level and you can blaze right through them.
The three Strikes you lot need to complete are Lake of Shadows in the EDZ, The Disgraced in the Cosmodrome, and The Glassway on Europa.
Consummate A Hollow Coronation
At that place's one last mission to knock out subsequently you revisit the Helm. Utilize the new Hollow Coronation node on the HELM's Director screen to go to the mission, where yous can claim the gun and larn its subconscious potential: Information technology can destroy sure rocks in the Dreaming City and the Dominant Plane, allowing you to carve your way to secret locations.

Catch the gun and fight off the Hive enemies to put information technology through its paces. Yous tin get basics hither, as Ager'south Scepter volition continually refill with ammo. Just continue killing Hive until the boss falls. After that, it's back to Mara for some final story tidbits about Crow, and you lot'll have earned your new Exotic.
GameSpot may get a commission from retail offers.
Got a news tip or want to contact united states of america directly? Email news@gamespot.com

A Hollow Coronation Step 1,
Source: https://www.gamespot.com/articles/destiny-2-agers-scepter-exotic-quest-guide-where-to-find-all-atlas-skews-for-tracing-the-stars/1100-6495537/
Posted by: cuellarfeak1987.blogspot.com
0 Response to "A Hollow Coronation Step 1"
Post a Comment